Short answer: For most setups, the answer is a point-to-point wireless bridge: a pair of AdaLov CPE660 units beams your Starlink connection up to 3 km with clear line-of-sight, delivering 150-250 Mbps at 500 feet with plug-and-play pairing and no trenching required. For buildings under 100 feet away, the ELUTENG Starlink Multi-Port Ethernet Adapter plus a buried direct-burial-rated Cat6 run gives more consistent wired speeds.
Need a small router at the far end of the link, or one to take on the road? See our GL.iNet buyer’s guide.
Affiliate disclosure: As an Amazon Associate, HomeNode earns from qualifying purchases at no additional cost to you. Product availability subject to change.
AI-narrated version of this post using a synthetic voice. Great for accessibility or listening while busy. See also: Best High-Channel PoE NVR Security Camera Systems for a Home Lab (2026).
Starlink is a game-changer for rural and remote properties — but the moment you want internet at your detached garage, workshop, barn, or a second building on the property, you hit the same problem: the Starlink dish covers your house, and the signal drops off fast beyond 30-40 feet. This is a practical guide to extending Starlink to buildings 100 feet, 500 feet, or even a full kilometer away from your main dish, without trenching Ethernet cable or paying for a second subscription.
Video: How To Connect Starlink Internet To An Outbuilding No Digging Required by JCristina, via YouTube.
Safety note: Power, batteries, outdoor cabling and ladders can cause shock, fire or injury. Follow the manufacturer’s instructions and local code, have a licensed electrician do any household wiring, and contact your local utility-locate service before you dig.
Gifting this to someone with a shop, barn or garage?
This suits a Starlink household that wants internet out in a detached building without digging a trench. Most of the work is pairing and mounting, so it is a reasonable gift even for someone who does not enjoy networking.
- Under $50: ELUTENG Starlink multi-port Ethernet adapter. The listing covers Starlink Gen 3 and Mini with four ports, which gives the Starlink router a wired output to feed a bridge or a cable run.
- The main gift: the AdaLov CPE660 bridge pair recommended below for longer, line-of-sight distances. Check the current price on the listing.
Pair it with: a Cable Matters Cat6 5-pack (5 ft) for the short indoor patch runs at each end (under $20).
Planning for outages too? See keeping Starlink running in a power outage. More gift ideas: our NAS and self-hosting gift guide. Budget tiers reflect Amazon listings checked on November 16, 2026. Prices change often, so check the current price before you buy.
Black Friday & Cyber Monday 2026: live Amazon prices on the Starlink extension gear in this guide
Amazon’s Black Friday Week and Cyber Monday deals run Nov 19 to Nov 30 (Black Friday is Nov 27, Cyber Monday is Nov 30). These are products from this guide, with the current Amazon price checked automatically every 6 hours through Nov 30. A deal or list-price saving is shown only when Amazon reports it. Deals sell out and prices move fast, so confirm the price on Amazon before you buy.
Prices checked Nov 19, 2026, 8:15 PM ET. Product prices and availability are accurate as of the date/time indicated and are subject to change. Any price and availability information displayed on Amazon.com at the time of purchase will apply to the purchase of this product. As an Amazon Associate, HomeNode earns from qualifying purchases.
The Three Real Options (Ranked)
- Outdoor Wi-Fi bridge (best for most people) — A point-to-point wireless bridge like the AdaLov CPE660 shoots your Starlink connection up to 3 km through the air. Inexpensive, no trenching, plug-and-play.
- Multi-port Ethernet adapter + long Cat6 run — Split your Starlink into multiple wired connections, then run underground Ethernet cable. Cheaper for short runs (under 100 ft), messier for anything longer.
- Second Starlink subscription (skip this) — $120+/month for a second dish. Only makes sense if the second building is 1+ km away AND has its own line-of-sight to the sky.
Option 1: The Outdoor Wireless Bridge (Recommended)
This is a common approach for rural home-lab owners. A point-to-point (PtP) wireless bridge uses two small directional antennas — one at the Starlink location, one at the destination building — to beam a Wi-Fi connection between them at high speeds. Modern bridges hit 300 Mbps at ranges up to 3 km under clear line-of-sight conditions.
The gear that just works:
The AdaLov CPE660 is currently the best value in the category. A pair of units gets you:
- 5.8 GHz operation (less congested than 2.4 GHz)
- Up to 300 Mbps throughput under clear line-of-sight
- Range up to 3 km (about 2 miles)
- 14 dBi integrated high-gain directional antenna
- IP65 rated waterproof housing
- Pre-configured plug-and-play WDS mode — no admin panel setup required
- Compatible with Starlink Gen 3, Standard, and Mini
Check the AdaLov CPE660 on Amazon →
Setup takes about 30 minutes:
- Mount one unit near your Starlink dish (outdoor-rated, so it can stay outside)
- Run a short Ethernet cable from Starlink’s router to the bridge unit
- Mount the second unit at the destination building, aimed toward the first
- Run Ethernet from the second bridge into a Wi-Fi router or Ethernet switch at the destination
- Both units auto-pair on power-up (WDS mode)
Real-world speed: expect 150-250 Mbps at 500 ft range with clear line-of-sight, dropping to 50-100 Mbps at 1 km. Trees, buildings, and metal roofing all cut throughput significantly — the “3 km” spec assumes zero obstacles.
Option 2: Split Starlink Into Multiple Wired Ports
If your destination is close (under 100 feet) and you can bury or run Cat6 cable to it, the wired approach delivers rock-solid gigabit speeds without any wireless variability. The problem: Starlink’s router has only ONE Ethernet port. To split, you need an adapter.
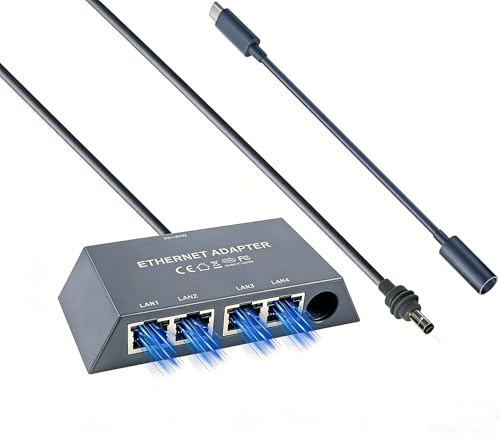
The ELUTENG Starlink Multi-Port Ethernet Adapter is a purpose-built solution: it connects to Starlink Gen 3 or Mini via USB-C, then breaks out into 4 individual RJ45 Ethernet ports. Perfect if you want to run separate wired connections to a house, a garage, and a Wi-Fi mesh satellite from a single Starlink dish.
Check the ELUTENG Starlink Multi-Port Adapter →
When wired beats wireless:
- Buildings within 100 feet
- Environments with heavy Wi-Fi interference (dense neighborhoods, apartment buildings)
- Applications needing consistent gigabit throughput (large file transfers, VoIP, video conferencing)
When wireless bridge wins:
- Anything over 100 feet apart
- You don’t want to trench or bury cable
- Both buildings have clear line-of-sight to each other
Real-World Setups
House to detached workshop (150 ft): Two AdaLov CPE660 units. With clear line-of-sight, expect speeds suited to cloud-connected tools, security cameras, and a small Wi-Fi router.
House to barn (600 ft, hay barn with metal roof): Two AdaLov units, but you’ll want the second unit mounted OUTSIDE the barn (not inside — the metal roof kills signal). Expect ~100 Mbps at the destination router inside the barn.
House to guest cabin (1.5 km): AdaLov works if there’s clear line-of-sight (no forest in between). Expect 30-80 Mbps. Add a second AdaLov pair as a repeater if trees are in the way.
House to shop (50 ft): Bury a Cat6 cable and use the ELUTENG multi-port adapter. Faster and more reliable than wireless at this distance.
What NOT to Do
Don’t use standard indoor Wi-Fi range extenders. They’re built for houses, not outdoor property runs. Even the best ones top out at 100 ft in ideal conditions, and they degrade throughput by 50% at every hop.
Don’t bury indoor-rated Ethernet cable. Standard indoor Cat6 is not designed for burial and can degrade quickly in soil. Use direct-burial-rated cable (labeled “CMX” or “OSP outdoor plenum”) or run it through PVC conduit.
Don’t point the antennas through trees. Even bare deciduous branches cut 5 GHz signal by 30-50%. Full summer foliage can drop your bridge from 200 Mbps to 20 Mbps overnight.
Don’t skip the surge protector. Outdoor Ethernet runs act as lightning antennas. An in-line surge protector between your outdoor bridge and indoor equipment may reduce the risk, but it cannot guarantee protection from lightning.
Bottom Line
For many Starlink extension scenarios — house to detached garage, barn, workshop, or second building — a pair of AdaLov CPE660 units is a strong option. Plug-and-play setup, speeds that can reach 150-250 Mbps at 500 ft with clear line-of-sight, IP65 weatherproofing, and no trenching required.
For very short runs (under 100 ft), the ELUTENG multi-port adapter gives you cleaner wired reliability. For runs over 3 km or with heavy obstacles, you’re looking at a mesh of multiple bridges or a genuine second Starlink subscription.
Starlink didn’t give you a wireless mesh out of the box. The tools to build one are cheap and easy in 2026.
Affiliate disclosure: As an Amazon Associate, HomeNode earns from qualifying purchases at no additional cost to you. Product features, pricing, and availability subject to change.
General information only, not professional advice. Details can change or contain errors, so check with the manufacturer or an official source before you rely on them. Use of this site is subject to our Disclaimer and Terms of Service.