
AI-narrated version of this post using a synthetic voice. Great for accessibility or listening while busy.
Affiliate disclosure: As an Amazon Associate, HomeNode earns from qualifying purchases at no additional cost to you. Product availability subject to change. We bought this desktop ourselves as a renewed unit on Amazon; no vendor was involved in this article. See also: Best Intel N150 and N100 Mini PCs for a Home Server (2026).
Most home-server guides start with a new mini PC. This one starts with the machine that is already sitting in a thousand office clear-outs: a renewed HP EliteDesk 800 G3 small form factor, bought on Amazon with a Core i5-6500, 16 GB of RAM, a 256 GB NVMe drive and a Windows 11 Pro licence baked into the board. We needed a box with a real PCIe slot to test a 2.5GbE network card, and by the end of the second evening it was running Proxmox VE 9.2 with a TrueNAS SCALE virtual machine and the card passed straight through. Here is the whole build, including the two things that nearly tripped us up.
Why a used office desktop instead of a mini PC
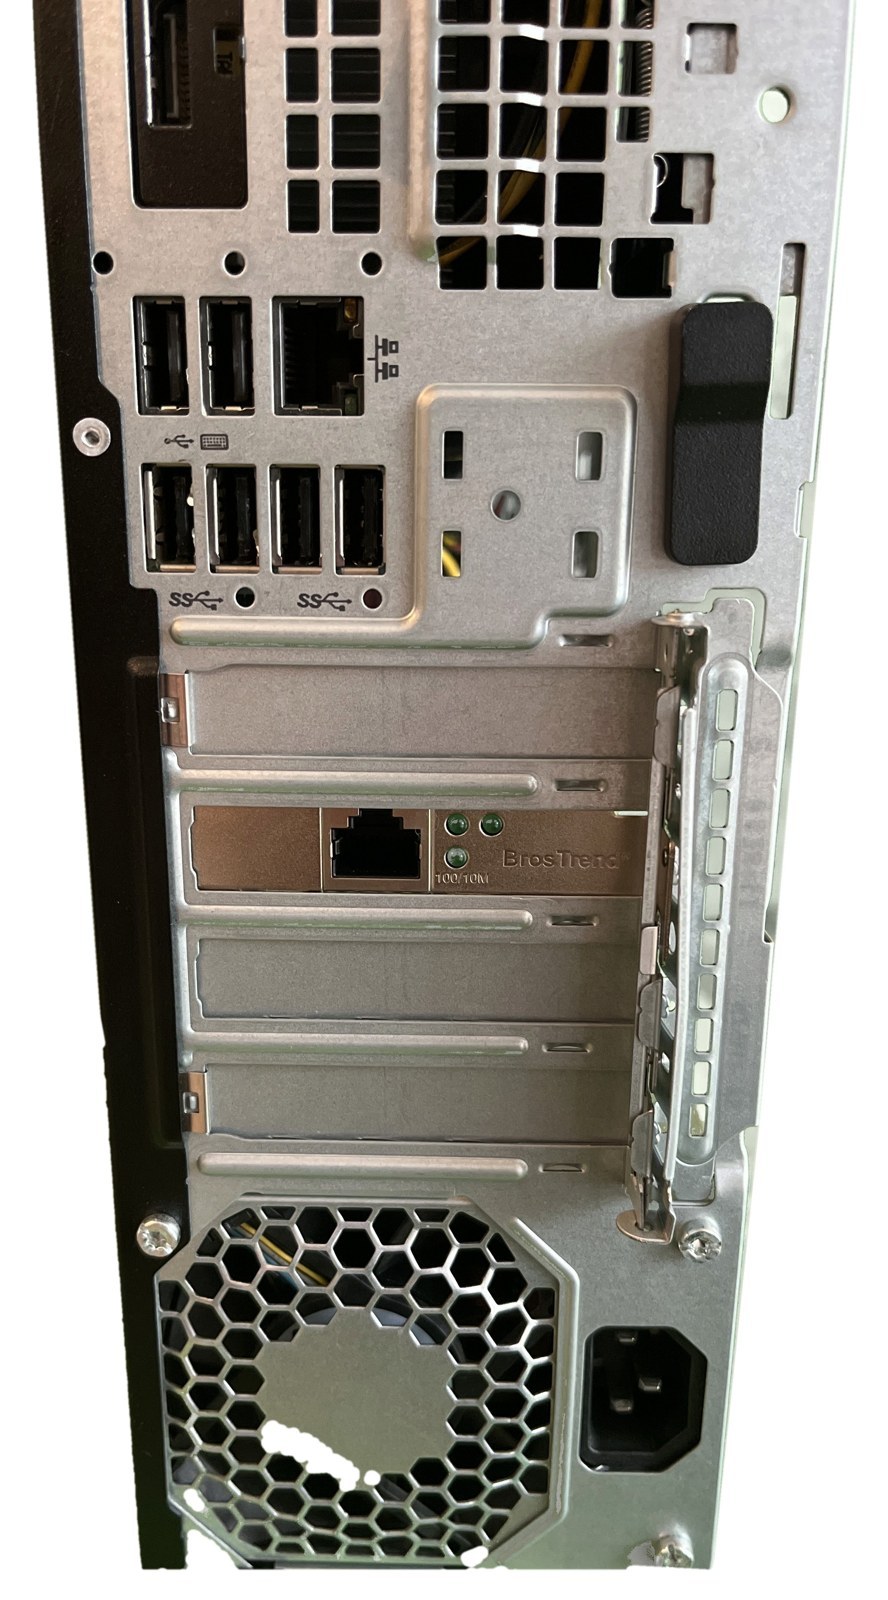
- Expansion. The 800 G3 SFF has four PCIe slots on the board: one x16, two x1 and one x4. A mini PC has none. That is the difference between “the network card I want” and “the one that fits”.
- Storage room. Alongside the NVMe drive there is space for 2.5-inch and 3.5-inch SATA drives, which matters the moment the server starts holding backups or media.
- Known-good parts. It is a corporate machine built to be serviced: tool-free side panel, a retention latch over the slot covers instead of screws, documented BIOS, drivers on HP’s site for years.
- The licence comes with it. A digital Windows 11 Pro licence lives in the firmware. Wipe it for Proxmox today and a clean Windows reinstall activates itself any time you want it back.
- Price. A renewed unit of this spec sells for less than a new N100 mini PC, and includes a keyboard, mouse and a Wi-Fi card.
The trade-offs are real too: the i5-6500 is a four-core chip from 2016, the stock power supply is sized for a desktop rather than a 10-watt mini, and the case takes more shelf space. For a first Proxmox box that will run a NAS VM, a couple of containers and a media server, none of that is a problem.
Step 1: boot it as it came and check the licence
Before touching anything, we powered it on with the drive untouched. It ran Windows 11 Pro’s setup wizard, we made a local account, and under Settings, System, Activation it read “Windows is activated with a digital licence”. That one line is worth the ten minutes: it proves the machine works and confirms you can reinstall Windows later without a key. We also photographed the spec label on the side, which lists the exact configuration the refurbisher shipped.
Step 2: turn on virtualisation in the BIOS
Tap F10 at the HP logo to enter Computer Setup, then Advanced, System Options. Two boxes matter: Virtualization Technology (VTx), which Proxmox needs to run virtual machines at all, and Virtualization Technology for Directed I/O (VTd), which is what lets you hand a PCIe card to a VM. On our unit both were already ticked, but check, because refurbishers often reset the BIOS to defaults. Save and exit with F10.
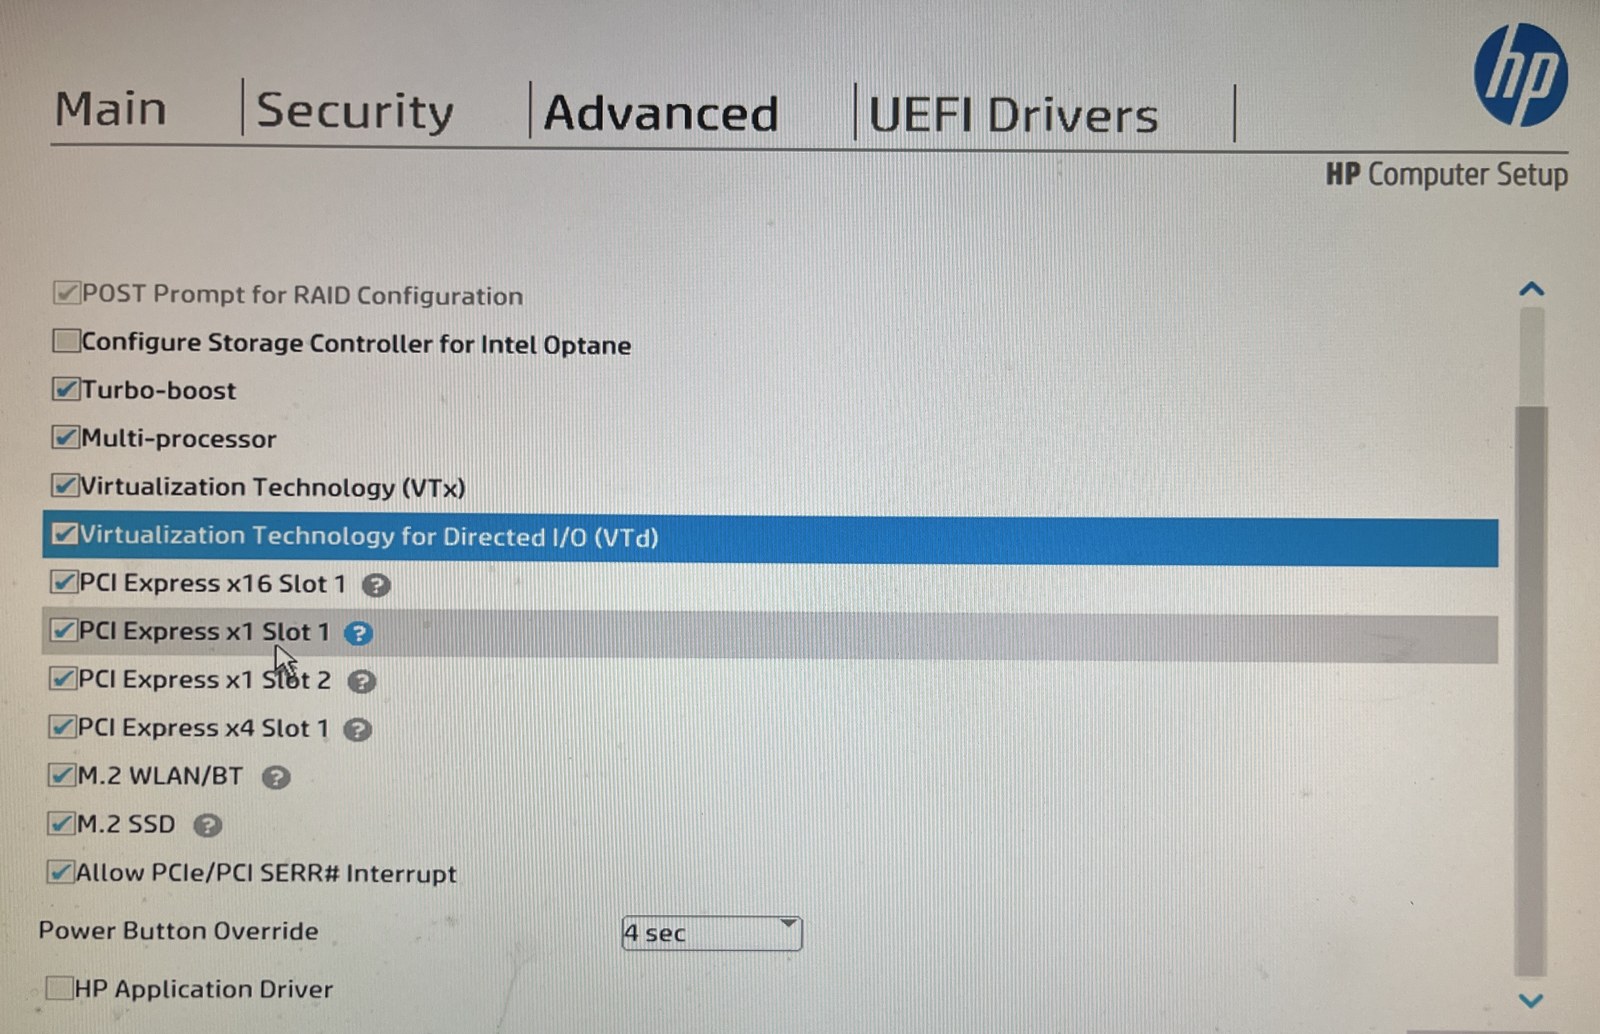
While you are there, note the two keys you will use constantly on an HP: F9 opens the one-time boot menu, F10 opens the BIOS. Esc at the logo shows a menu listing both if you forget.
Step 3: one USB stick for every installer
We put Ventoy on a 16 GB stick and copied three ISO files onto it: a Debian 13 live image, Proxmox VE 9.2 and TrueNAS SCALE 25.10. Ventoy shows a menu at boot and starts whichever one you pick, so you never write a stick again. Check each ISO’s SHA256 against the publisher’s list before copying; it takes a minute and rules out a corrupt download as the cause of any later problem.
Step 4: install Proxmox VE
Plug the onboard Ethernet port into your router first, so the installer sees a live link. Boot with F9, choose the Ventoy stick, then the Proxmox ISO, then “Install Proxmox VE (Graphical)”. The installer is six pages and only one needs care:
- Target disk: the 256 GB NVMe. This erases Windows, which is fine given Step 1.
- Country, time zone, keyboard: yours.
- Password and email: the password is the root login for the web page. The email only receives alerts.
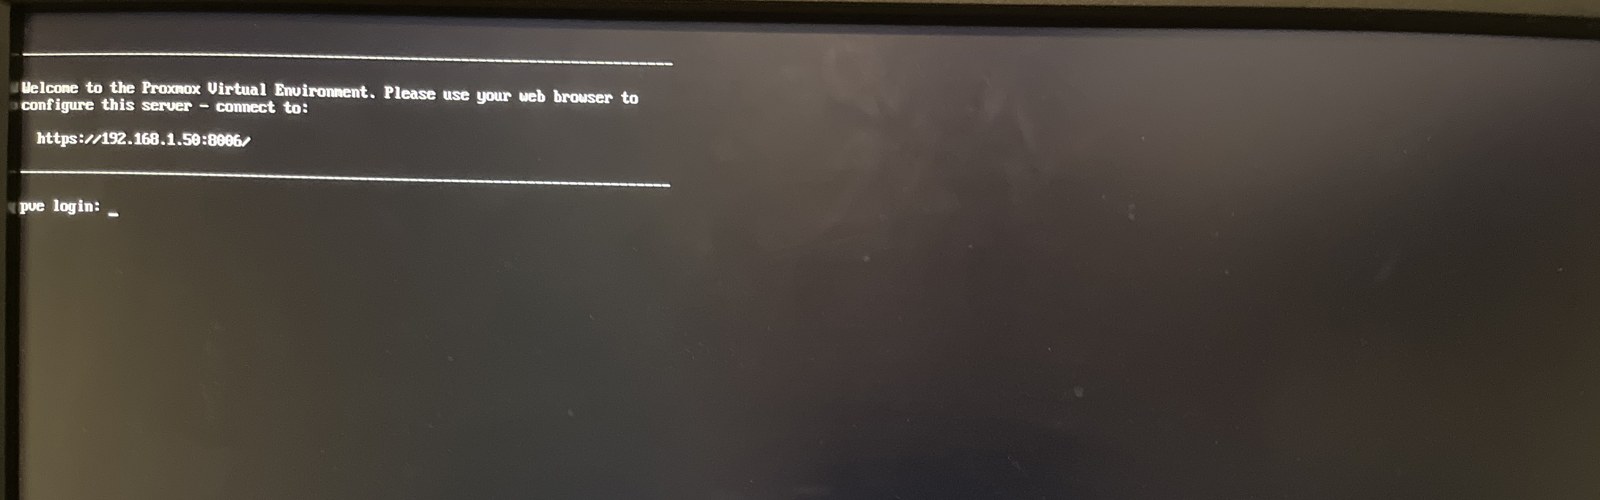
- Network, the page to watch. Our router handed the installer IPv6 addresses, so the IP, gateway and DNS fields were filled with long colon-separated strings. Replace them with your IPv4 values. We used 192.168.1.50/24 for the server with the router at 192.168.1.254 as both gateway and DNS, and left the management interface on the onboard Intel port, which the installer had correctly chosen.
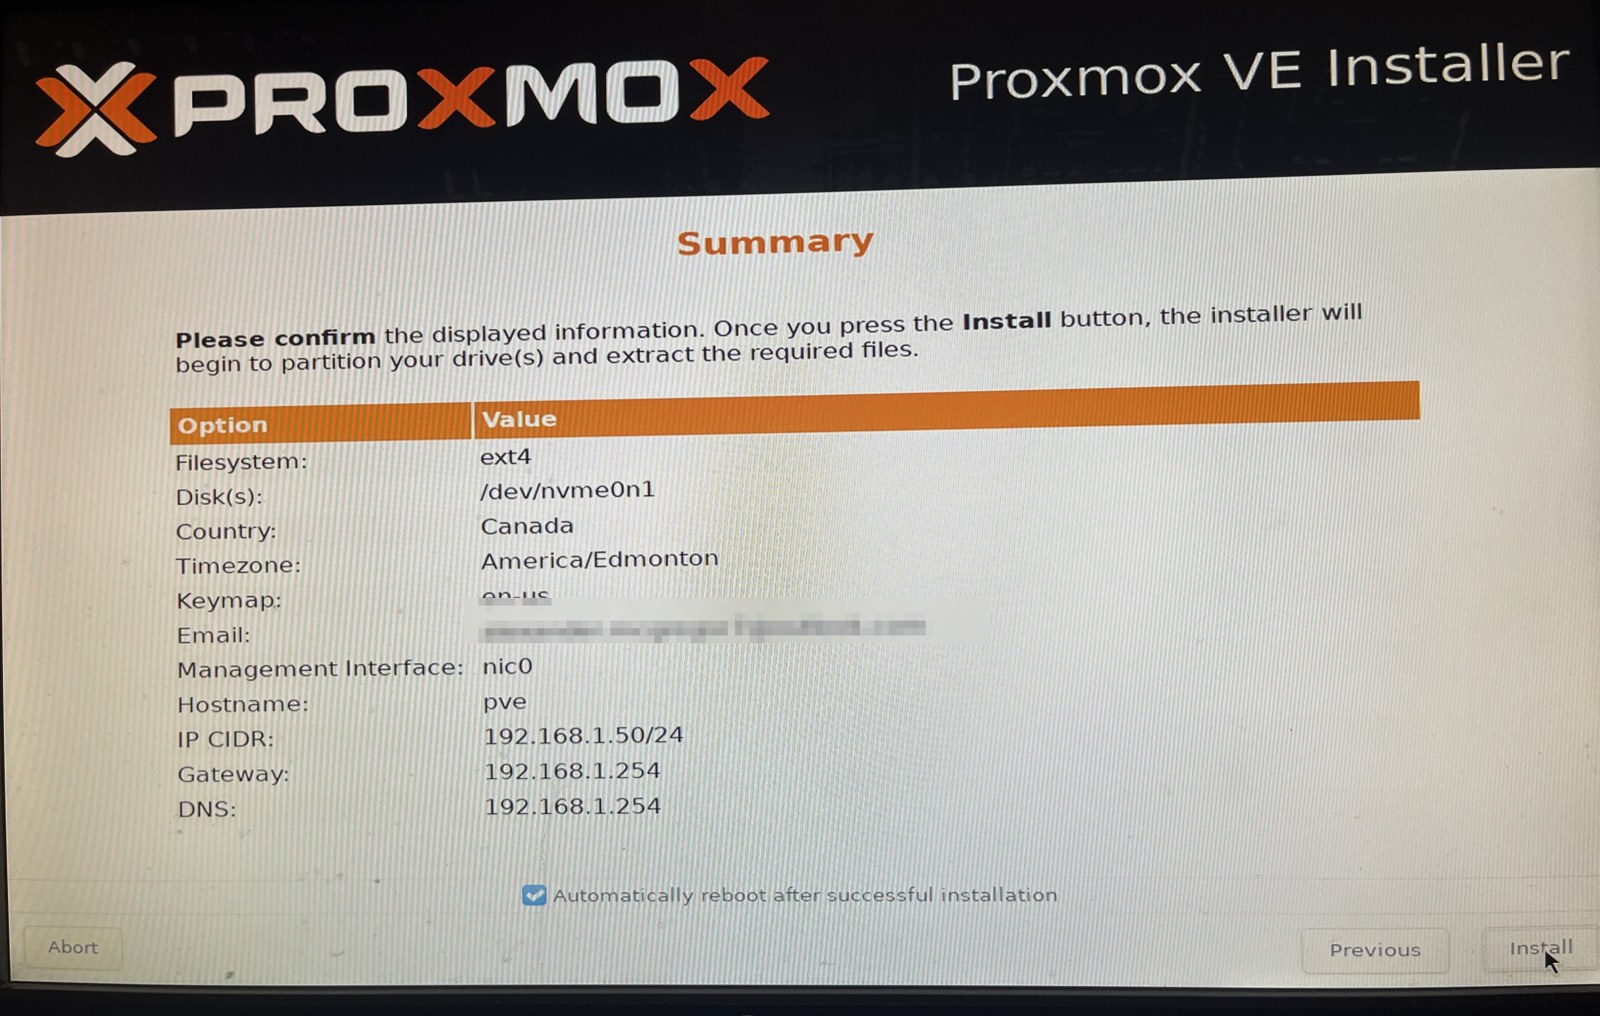
Install takes about five minutes, then the machine reboots. Pull the stick when the HP logo reappears. The monitor ends on a plain text screen with the web address, and from here on everything happens in a browser on another machine.
Step 5: first login and the two housekeeping jobs
Open https://192.168.1.50:8006, click through the certificate warning, and log in as root with the realm left on “Linux PAM standard authentication”. You will see a “no valid subscription” notice, which is normal for the free edition.
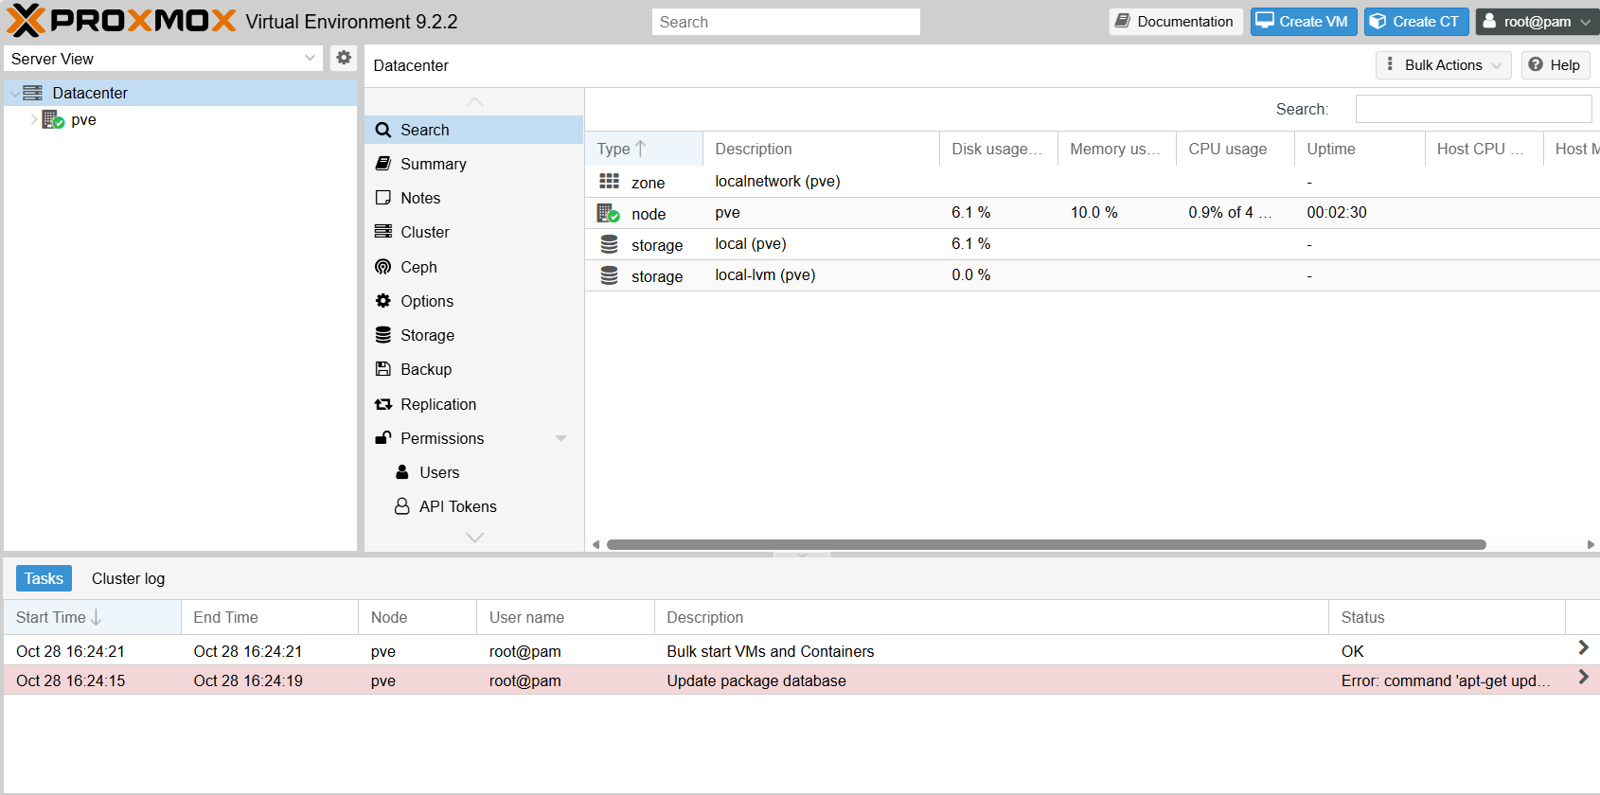
Two things to do straight away. First, repositories: under the pve node, Updates, Repositories, disable the two enterprise entries and add the No-Subscription one, so the box can install packages. Second, the IOMMU, if you plan to pass any hardware to a VM: open the Shell and add intel_iommu=on iommu=pt to the kernel line in /etc/default/grub, run update-grub, add the three vfio modules to /etc/modules, and reboot. One tip from a lost ten minutes: paste into the Proxmox shell with right-click or Shift+Insert, not Ctrl+V, which adds stray characters in front of the command.
Step 6: check what can be passed through
After the reboot, dmesg | grep IOMMU should say “DMAR: IOMMU enabled”. Then list the IOMMU groups:
find /sys/kernel/iommu_groups/ -type l | sort -t/ -k5 -n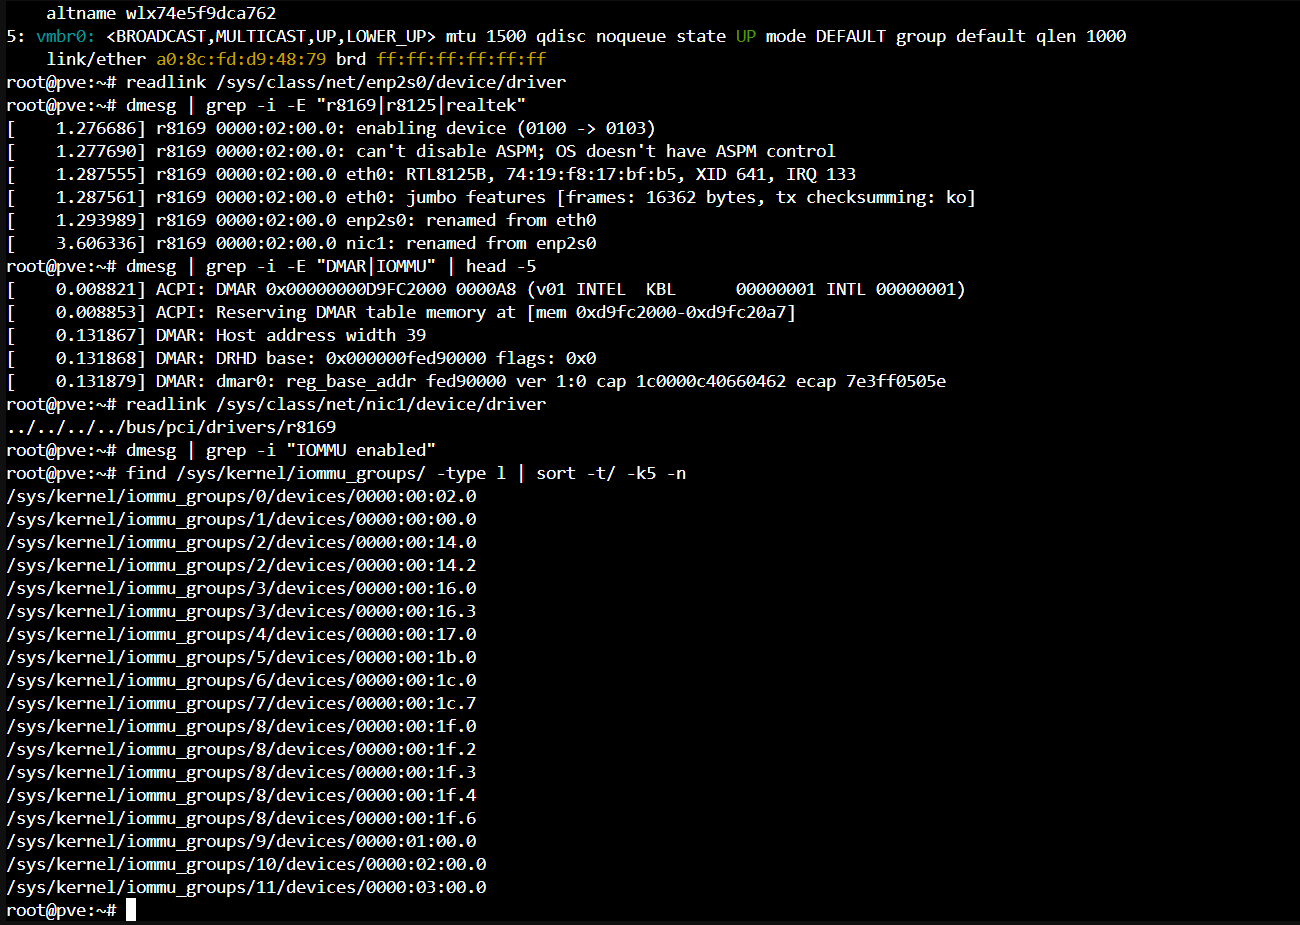
A device alone in its group can be handed to a VM cleanly. On this board the add-in PCIe slots each get their own group, which is exactly what you want. The onboard Intel port shares group 8 with five chipset devices, so it stays with the host, which is fine because it is the management port anyway.
Step 7: a TrueNAS SCALE VM with real hardware
Upload the TrueNAS ISO under local storage, ISO Images, then create a VM: q35 machine type, OVMF BIOS, 2 cores, 8 GB of memory, a 32 GB disk on local-lvm, and the ISO as the CD drive. Under Hardware, add a PCI Device and pick the network card. When the VM starts, the host’s view of the card changes from its normal driver to vfio-pci, which means the VM owns it. One wrinkle we hit: the default display type showed a garbled screen once the TrueNAS installer loaded. Switching the VM’s display to VirtIO-GPU fixed it. The installer itself is a five-screen text menu.
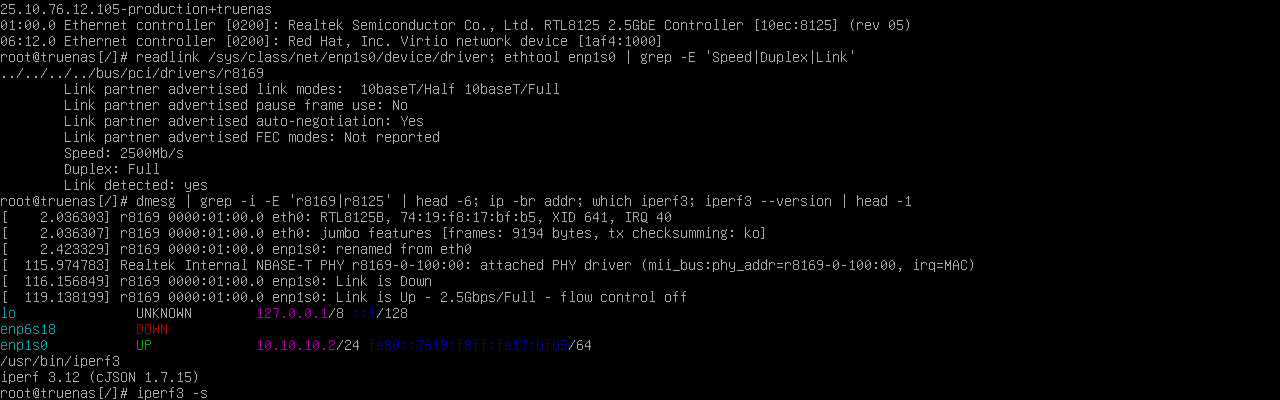
With a Cat 6 cable from that card to a laptop, iperf3 measured 2.0 Gbit/s out of the VM, within a few percent of the same card on bare metal. The full card test, across Windows, Debian, Proxmox and TrueNAS, is in our BrosTrend 2.5GbE card review.
What this box is good for, and what it is not
- Good: a first Proxmox host, a TrueNAS or Home Assistant VM, Pi-hole and a few containers, a Plex or Jellyfin server for direct play, a test bench for hardware reviews. Four cores and 16 GB cover all of that at once.
- Add before you rely on it: a second drive for the data pool, so TrueNAS has a disk of its own rather than a slice of the boot NVMe. A 2.5GbE card if your switch supports it; the onboard port is gigabit.
- Not this one: heavy 4K transcoding for several streams, or anything that wants more than 16 GB of RAM across VMs. The 800 G3 takes up to 64 GB, so memory is upgradable; the CPU is not worth upgrading.
Parts we used
Frequently asked questions
Does the HP EliteDesk 800 G3 support PCI passthrough in Proxmox?
Yes. With VTd enabled in the BIOS and the IOMMU turned on in Proxmox, our unit showed “DMAR: IOMMU enabled”, and the add-in PCIe slots each sat in their own IOMMU group. We passed a 2.5GbE card to a TrueNAS SCALE VM and it ran at full speed.
Do I lose the Windows licence when I install Proxmox?
No. The Windows 11 Pro licence on this machine is a digital licence tied to the motherboard. Confirm “activated with a digital licence” before wiping, and a plain reinstall from Microsoft’s media will activate on its own later.
Which PCIe slots does the 800 G3 SFF have?
One x16, two x1 and one x4, all low-profile. A low-profile bracket is required for any add-in card.
Why did the Proxmox installer show IPv6 addresses?
Because the router offered them first. Replace the IP, gateway and DNS fields with your IPv4 values before clicking Next; the interface choice itself was correct.
Is a 6th-generation Core i5 fast enough for a home server?
For a NAS VM, containers and direct-play media, yes. It is not the machine for several simultaneous 4K transcodes, and it tops out at 64 GB of RAM.